
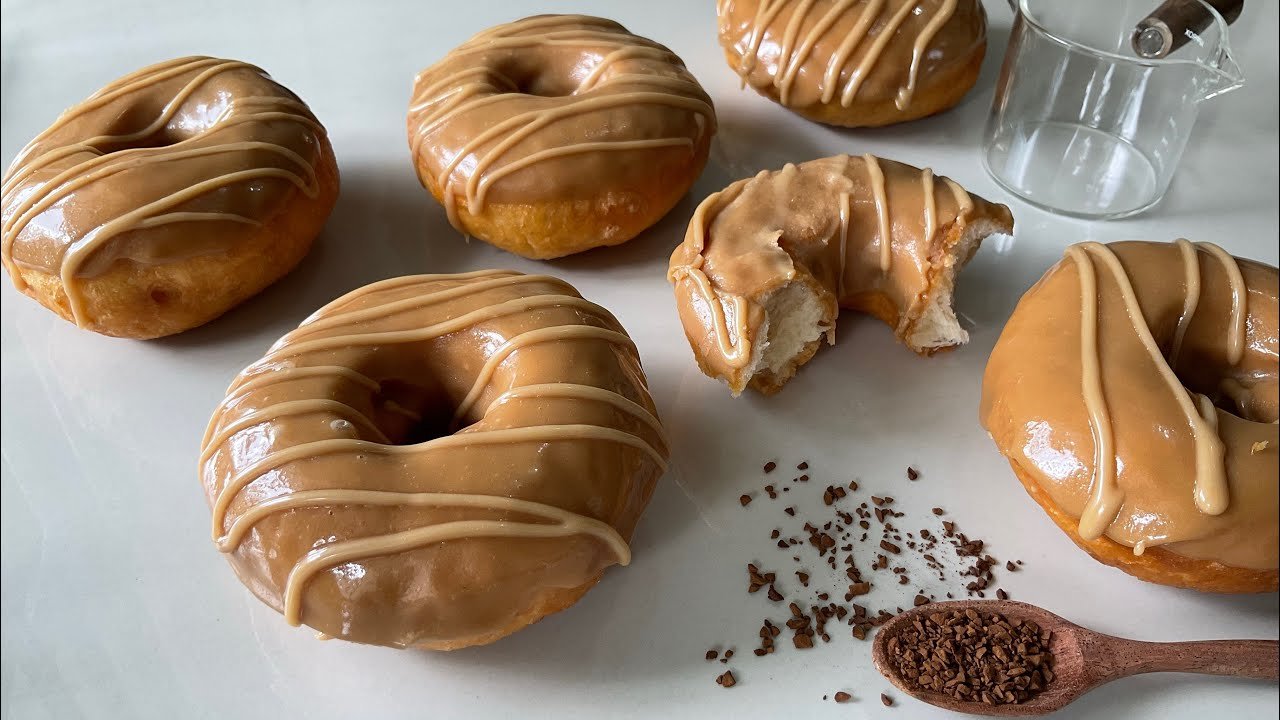
There is a specific kind of joy that comes from dunking a warm donut into a bowl of glaze and watching it turn glossy in seconds. It looks effortless in bakery windows and cooking videos, yet plenty of home bakers end up with glaze that slides right off, pools into a sticky puddle, or turns cloudy instead of shiny. If you have ever wondered how to glaze donuts so they look and taste like they came from a professional shop, you are in the right place.
This guide walks through the entire process, from mixing the glaze to getting that perfect shiny finish, along with the small details that most recipes skip. By the end, you will understand not just the steps but the reasoning behind them, so you can troubleshoot on the fly and adjust the glaze to your own taste.
What Makes a Great Donut Glaze
A great glaze does three things at once. It adds sweetness without overwhelming the donut, it sets into a firm but tender shell, and it looks glossy rather than dull or streaky. Getting all three right comes down to ratio, temperature, and technique, not fancy ingredients.
Most bakery style glazes are built on a simple foundation of powdered sugar and liquid, sometimes with a touch of fat for shine. The magic is not in complicated ingredients but in how carefully you measure and mix them. Once you understand the basic science, you can glaze donuts confidently every time, whether you are working with yeasted donuts, cake donuts, or baked donuts.
Ingredients You Need and Why Each One Matters
Before jumping into the method, it helps to know what each ingredient contributes. This is where many recipes go wrong: they list ingredients without explaining their role, which makes troubleshooting nearly impossible later.
Powdered Sugar
Powdered sugar, also called confectioners sugar or icing sugar, is the backbone of any donut glaze. Its fine texture dissolves quickly into liquid, creating a smooth base without the graininess you would get from granulated sugar. Always sift it first if it looks lumpy, since clumps will show up as small bumps in your finished glaze.
Liquid: Milk, Cream, or Water
The liquid you choose changes both the flavor and the finish. Whole milk gives a balanced, slightly rich glaze. Heavy cream produces a thicker, creamier coating with more shine. Water creates the thinnest, crispest shell, which is closer to what you find on classic old fashioned donuts. There is no single correct choice, only the one that suits the texture you want.
Vanilla Extract
A small amount of vanilla extract rounds out the sweetness and adds warmth. If you want a pure white glaze, use clear vanilla extract, since regular vanilla can add a faint amber tint. This detail matters more than people expect, especially if you are glazing donuts for photos or a special occasion.
A Pinch of Salt
Salt is optional but genuinely useful. It balances the sweetness of the powdered sugar and keeps the glaze from tasting one dimensional. Even a tiny pinch makes a noticeable difference.
Butter or Corn Syrup (Optional)
Some bakers add a small amount of melted butter for richness, while others include corn syrup to boost shine and prevent the sugar from crystallizing as it cools. Neither is essential, but both can elevate the finished look if you want that professional, glassy shine.
How to Glaze Donuts Step by Step
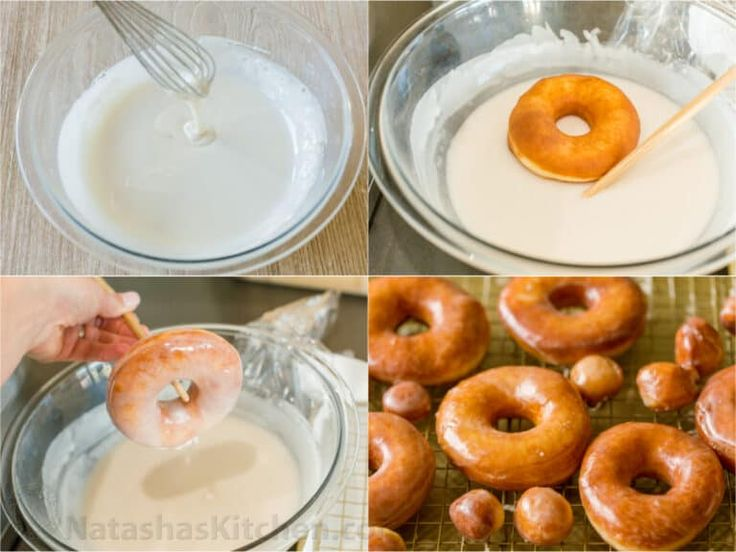
Now that you understand the ingredients, here is the actual process. This method works whether you fried your donuts at home or baked them, and it applies to both cake style and yeasted donuts.
Step 1: Fry or Bake Your Donuts First
Your donuts should be freshly cooked and still warm, but not piping hot, before you glaze them. If they are too hot, the glaze will melt completely and slide off. If they are fully cooled, the glaze will sit on top without soaking in slightly, which gives you that classic bakery texture where the glaze becomes part of the donut rather than just a topping.
Step 2: Mix the Glaze
In a medium bowl, whisk together your powdered sugar and liquid until completely smooth. Add vanilla extract and a pinch of salt, then whisk again. The glaze should be pourable but still coat the back of a spoon. If it runs off immediately without leaving a trace, it is too thin. If it barely moves, it is too thick.
Step 3: Set Up Your Glazing Station
Place a wire cooling rack over a baking sheet or piece of parchment paper before you start dipping. This catches the drips and keeps your counter clean, and it also allows air to circulate around the donut so the glaze sets evenly on all sides.
Step 4: Dip the Donuts
Hold the donut by its edges and dip the top half directly into the glaze, twisting gently to coat it evenly. Lift it out and let the excess drip back into the bowl for a second or two before placing it glaze side up on the rack. For a fully coated donut, you can dip both sides one after the other.
Step 5: Let the Glaze Set
Resist the urge to touch or stack the donuts right away. Most glazes need about fifteen to twenty minutes at room temperature to firm up into that signature slightly crisp shell. You will notice the surface changes from wet and shiny to a soft matte sheen once it has fully set.
Step 6: Double Dip for Extra Coverage
If you want a thicker, more indulgent glaze layer, dip the donut a second time after the first coat has set. This technique, sometimes called double glazing, is especially popular for cake donuts and gives a bakery style finish that holds up well for gifting or serving at parties.
Getting the Glaze Consistency Right
Consistency is the single biggest factor separating a good glaze from a frustrating one, and it is also the part most tutorials gloss over. Here is a simple way to think about it.
- Too thin: The glaze soaks into the donut instead of sitting on top, leaving a dull, uneven finish. Fix this by whisking in more powdered sugar, a tablespoon at a time.
- Too thick: The glaze sits in clumps and does not spread smoothly. Fix this by adding liquid a teaspoon at a time until it loosens up.
- Just right: The glaze coats a spoon in a thin, even layer and slowly drips off in a steady ribbon rather than a solid stream.
A helpful trick used by many pastry chefs is the ribbon test. Lift your whisk out of the bowl and watch how the glaze falls back in. If it forms a ribbon that sits on the surface for a few seconds before disappearing, your consistency is ready for dipping.
Common Mistakes and How to Fix Them
Even experienced bakers run into glaze problems occasionally, so it helps to know the fixes ahead of time rather than guessing in the moment.
Glaze Looks Grainy or Lumpy
This usually happens when the powdered sugar was not sifted or was mixed too quickly. Whisk longer, and next time sift the sugar before adding liquid.
Glaze Slides Off Completely
This typically means the donuts were too hot when dipped, or the glaze was mixed too thin. Let the donuts cool for a minute or two longer, or thicken the glaze slightly with more sugar.
Glaze Never Fully Sets
If your glaze stays tacky long after the recommended time, the humidity in your kitchen may be too high, or the ratio of liquid to sugar leaned too wet. Try reducing the liquid slightly next time, and glaze donuts in a cooler, drier spot if possible.
Glaze Dries Cloudy Instead of Shiny
A touch of corn syrup or melted butter can help here, since fat and glucose both contribute to a glossier finish. Pure sugar and water glazes tend to dry with a slightly more matte appearance.
Flavor Variations Worth Trying
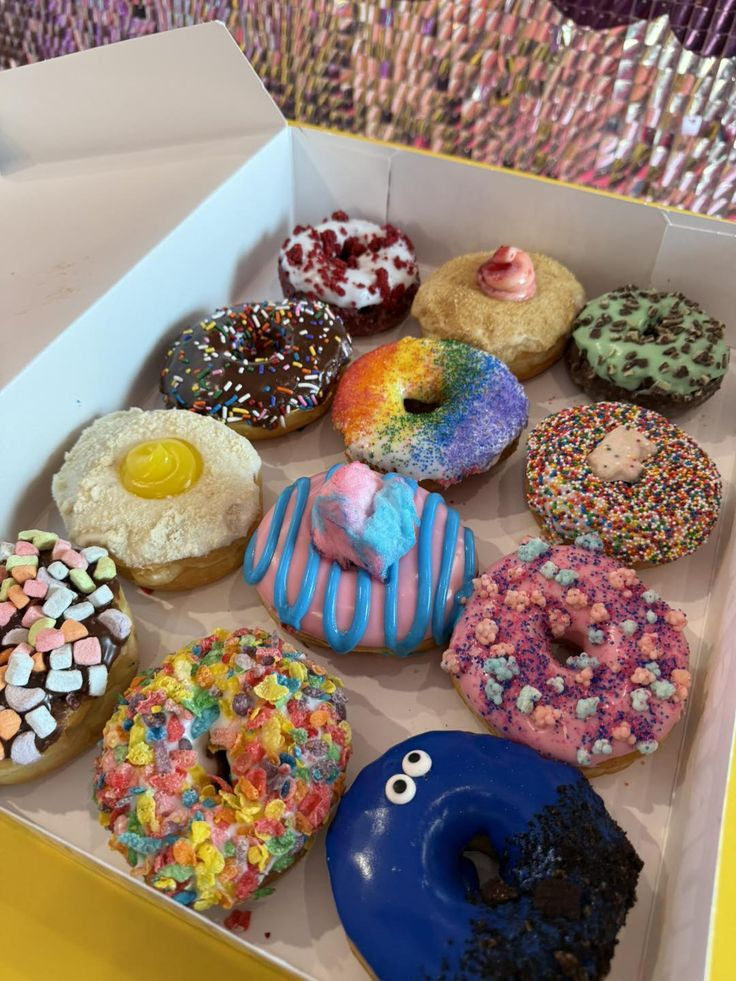
Once you have the base glaze down, flavoring it is simple and opens up a lot of creative options.
- Chocolate glaze: Whisk in a couple of tablespoons of cocoa powder along with the sugar for a rich, deep coating.
- Maple glaze: Replace part of the liquid with real maple syrup for a warm, earthy sweetness that pairs beautifully with fall spices.
- Citrus glaze: Swap the milk or water for fresh lemon, orange, or lime juice and add a bit of zest for a bright, tangy finish.
- Coffee glaze: Dissolve a small amount of instant espresso powder into the liquid before mixing for a subtle mocha flavor.
- Spiced glaze: Add a pinch of cinnamon, nutmeg, or cardamom for a cozy, seasonal twist.
Each variation follows the same basic ratio and technique described above, so once you understand the fundamentals, experimenting becomes easy rather than intimidating.
Dietary Friendly Glaze Options
Not everyone can or wants to use dairy or refined sugar, and a good glaze recipe should be adaptable.
For a dairy free version, simply swap the milk or cream for a plant based alternative like oat milk or almond milk, which both work well without changing the texture much. For a lower sugar approach, powdered erythritol or another powdered sugar substitute can replace traditional confectioners sugar, though the texture may set slightly differently, so plan for a short test batch first. Vegan bakers can follow the same substitutions, since the classic glaze recipe does not typically rely on eggs or gelatin.
Storing and Making Glaze Ahead of Time
Donut glaze can be made in advance, which is especially useful if you are prepping for a busy morning or a gathering. Store the mixed glaze in an airtight container in the refrigerator for up to two weeks. Before using it again, let it sit at room temperature for about thirty minutes and give it a good whisk, since it will thicken slightly when chilled.
Glazed donuts themselves are best enjoyed within a day of glazing. The glaze can soften or become slightly tacky if stored too long, especially in a humid environment, so plan to glaze donuts close to serving time whenever possible for the best texture and appearance.
Conclusion
Learning how to glaze donuts really comes down to understanding a few key principles: get your ratio of sugar to liquid right, dip your donuts while they are still warm, and give the glaze time to set undisturbed. Once those basics click, you can adjust flavor, thickness, and shine to match whatever you are craving, from a classic vanilla glaze to a rich chocolate or bright citrus version.
The next time you fry or bake a batch of donuts, use the ribbon test to check your glaze consistency, set up your cooling rack ahead of time, and do not be afraid to double dip for extra coverage. With these small adjustments, your homemade glazed donuts can easily rival anything from your favorite bakery.
Frequently Asked Questions
Do donuts need to be warm before glazing?
Yes, warm donuts help the glaze adhere better and slightly soak into the surface, creating that classic bakery texture. Just make sure they are not too hot, or the glaze will melt off completely.
How long does it take for donut glaze to set?
Most glazes set within fifteen to twenty minutes at room temperature. You will know it is ready when the surface changes from glossy and wet to a soft matte finish.
Can I make donut glaze ahead of time?
Yes, glaze can be stored in an airtight container in the refrigerator for up to two weeks. Bring it to room temperature and whisk well before using it again.
Why is my glaze too thin or runny?
This usually means there is too much liquid relative to powdered sugar. Whisk in more sifted powdered sugar a tablespoon at a time until it thickens to a smooth, pourable consistency.
Can I glaze donuts without dairy?
Absolutely. Replace milk or cream with a plant based alternative like oat or almond milk for a dairy free glaze that still sets and tastes great.
